


Roofing Website Templates Features for Presenting Roofing Installation Steps
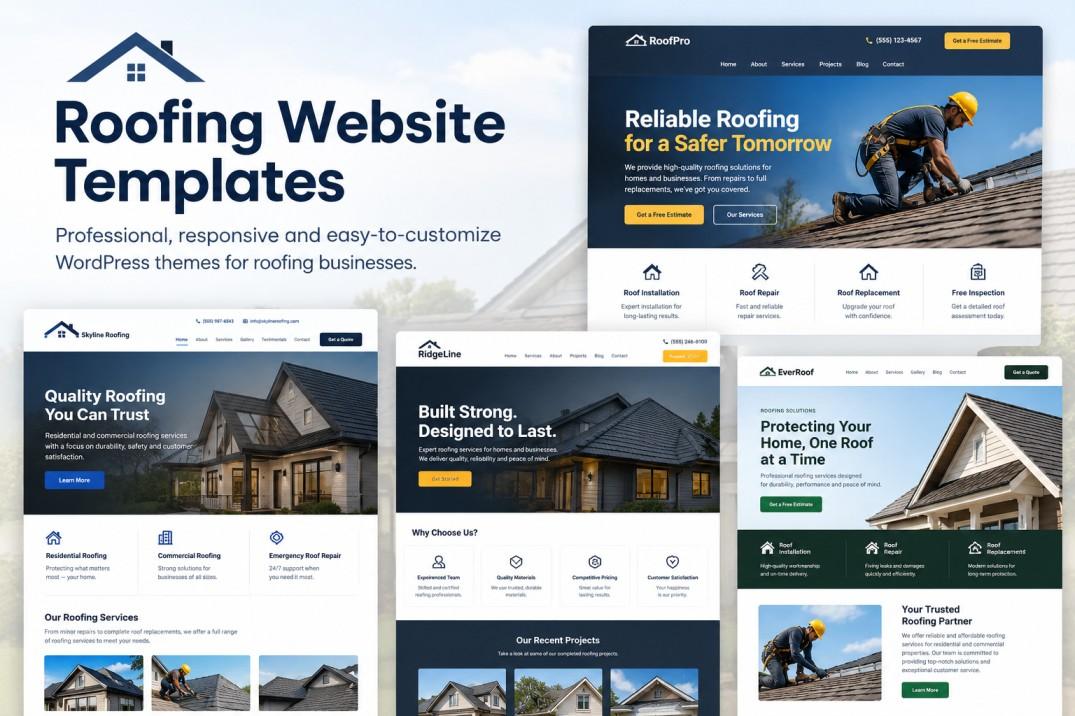
Getting a new roof is a big decision. It costs a lot, it takes several days, and it changes how the whole house looks. Most homeowners feel nervous about it. They do not know what will happen on day one, how much noise to expect, or when the job will be done. Roofing website templates can help explain the roofing installation process clearly, giving homeowners a better idea of what to expect before the project begins.
If your website explains the installation steps in a clear way, those worries go down fast. People feel they know what they are getting into, and they trust you more. The template you use makes a big difference here. Let's look at the features that help you present installation steps in a simple, friendly way.
Why Installation Steps Should Be on Your Website
Customers Want to Know What to Expect
Nobody likes surprises when workers are on their roof. Showing the steps ahead of time helps people plan. They can move cars, put away garden items, and warn the neighbors if needed.
It Shows You Have a Clear Process
A company with a clear step-by-step plan looks organized. Customers think, "These people know what they are doing." That feeling often matters more than the lowest price.
It Answers Questions Before They Are Asked
Many phone calls start with questions like "How long will it take?" or "Will you clean up?" If your website already answers them, your team saves time, and customers feel looked after.
Common Installation Steps to Explain
Step One: Inspection and Quote
Explain that you check the roof first, measure it, and give a clear quote. Mention that this is the time for customers to ask questions and choose materials.
Step Two: Choosing Materials and Colors
Tell people they can pick shingles, tiles, or metal panels, along with colors. A small photo gallery of options can go right here.
Step Three: Preparing the Site
Before work starts, the crew protects the yard, plants, and walls. Explain this in a few lines, since many homeowners worry about damage to their property.
Step Four: Removing the Old Roof
If the old roof needs to come off, say so. Mention that this can be noisy and that debris is collected and cleared away.
Step Five: Checking and Fixing the Roof Deck
Under the old roofing is the wooden base. Explain that the crew checks it for rot or damage and repairs it before putting anything new on top.
Step Six: Installing the New Roof
This is the main part. Explain in plain words that protective layers go down first, then the new roofing material, then the details around chimneys and vents.
Step Seven: Cleanup and Final Check
Finish by explaining that your team cleans the area, checks for stray nails, and does a final walk around with the homeowner.
Read More: Construction Company WordPress Theme - Powerful & Modern Design
Template Features That Make Steps Easy to Follow
Timeline or Process Layout
A timeline layout shows the steps one after another, with numbers or dots joining them. Visitors can see the whole job from start to finish in a single glance. Many roofing templates come with this layout ready to use.
Icons for Each Step
A clipboard for inspection, a color palette for materials, a hammer for installation. Icons make each step easy to spot and help the page look friendly rather than crowded.
Photos From Real Jobs
Real pictures of your crew at work are much better than stock photos. Show the old roof, the work in progress, and the finished result. Just make sure customers are fine with their homes being shown.
Before and After Sliders
A slider lets visitors drag across a picture and see the old roof on one side and the new one on the other. It is simple, and people love it.
Expandable Sections
Some visitors want only the basics, others want every detail. Accordion sections let people open the steps they care about without making the page very long.
Short Videos
A quick video of the installation, sped up, can show a full job in under a minute. Add captions so people can watch without sound.
Features That Help Visitors Take Action
Free Quote Button
After reading the steps, many visitors are ready to ask for a price. Place a clear button like "Get a Free Roof Quote" at the end of the process section and again at the bottom of the page.
Click to Call on Mobile
Many people browse roofing companies from their phone. A click-to-call button lets them reach you with one tap, and a sticky version stays visible as they scroll.
Short Contact Form
Keep it simple. Name, phone number, and a short message are usually enough. Long forms push people away.
Making the Page Comfortable to Read
Use Everyday Words
Instead of "tear-off and substrate evaluation," say "we remove the old roof and check what is underneath." Plain words keep people reading.
Add Time Estimates Carefully
People like to know how long each step takes, but every roof is different. Use phrases like "usually takes one to three days for an average home" and mention that weather and roof size can change this.
Keep It Honest
Do not promise a perfect schedule if weather can cause delays. Honest timing helps avoid unhappy customers later.
Keeping the Design Fast and Mobile Friendly
Mobile-Friendly Layout
Many visitors will read your steps on a phone. Pick a template with big text, easy buttons, and images that fit the screen. Test it on your own phone before you publish.
Fast Loading
Roofing photos can be large. Compress your images and choose a template that loads quickly so visitors do not leave.
Conclusion
A new roof is a big project, and customers feel better when they can see how it will go. A clear timeline, simple icons, real job photos, and an easy quote button help people understand your process and trust your team. The right template makes this simple to set up. If you want to build or refresh your site, look at premium WordPress Templates made for roofing businesses. They usually come with ready-made process sections, galleries, and contact forms, so you can present your installation steps in a clean and professional way without much extra work.
Frequently Asked Questions
1. Why should I show installation steps on my roofing website?
It helps customers know what to expect, which lowers their worry. It also shows that you have a clear and organized way of working.
2. How many steps should I include?
Five to seven simple steps are usually enough. Keep each one short, with extra details hidden in expandable sections.
3. Should I add photos or videos?
Yes. Real photos from your jobs and a short video make the process feel real and easy to understand.
4. Can I mention how long each step takes?
Yes, but use rough ranges and mention that weather and roof size can change the time. This keeps expectations realistic.
5. Do I need coding skills to build a process section?
No. Most WordPress roofing templates let you drag and drop timelines, icons, images, and buttons with no coding.

 English
 Arabic
 French
 Spanish
 Portuguese
 Deutsch
 Turkish
 Italiano
 Russian
 Romaian
 Portuguese (Brazil)
 Greek