

Popcorn Ceiling Removal: A Complete Homeowner’s Guide
Popcorn ceilings were once considered stylish and practical, but today they’re often seen as outdated and hard to maintain. If your home was built before the 1990s, there’s a good chance you have one. Homeowners across the country are now looking for ways to modernize their interiors, and popcorn ceiling removal is one of the most effective upgrades you can make.
This guide explains the entire process — from preparation and safety precautions to cleanup and refinishing — so you can make an informed decision.
What Is a Popcorn Ceiling?
Popcorn ceilings, also known as acoustic or stipple ceilings, were popular between the 1950s and 1980s. They were used to hide imperfections, reduce noise, and save time on finishing. The texture comes from spraying a mixture that hardens into a bumpy, cottage cheese–like surface.
While it served its purpose back then, today it’s considered outdated. It’s also difficult to clean, and in older homes, it may contain asbestos, which makes popcorn ceiling removal essential for safety and aesthetics.
Why Homeowners Choose Popcorn Ceiling Removal
Removing a popcorn ceiling offers several benefits beyond appearance. Here are the top reasons homeowners decide to remove it:
1. Modernized Appearance
Smooth ceilings create a cleaner, more modern look. Once the texture is gone, it instantly brightens the space and makes rooms feel larger.
2. Easier Maintenance
Popcorn ceilings collect dust and cobwebs, and they’re nearly impossible to clean without damaging the texture. Removal makes future cleaning and painting much easier.
3. Health and Safety Concerns
If your home was built before 1980, the ceiling might contain asbestos. Professional popcorn ceiling removal ensures safe handling and disposal to protect your health.
4. Increased Property Value
Homes with updated ceilings tend to sell faster and at higher prices. It’s a simple upgrade that can significantly improve resale appeal.
Before You Start: Safety and Testing
Before any removal begins, testing for asbestos is crucial. Many popcorn ceilings installed before 1980 used asbestos-based materials. You can purchase an asbestos test kit or hire a certified professional to take a sample for lab testing.
If asbestos is present, do not attempt removal yourself. Always hire a professional abatement company to safely remove and dispose of the material.
Step-by-Step Popcorn Ceiling Removal Process
If your ceiling has been tested and is free of asbestos, you can move forward with the removal. Here’s a simple breakdown of the process:
1. Prepare the Room
-
Remove all furniture and cover floors with plastic sheeting.
-
Turn off the electricity and remove light fixtures.
-
Use painter’s tape to protect walls and outlets.
2. Wet the Ceiling
-
Fill a spray bottle with water and lightly mist the ceiling.
-
Allow the water to soak for 15–20 minutes to loosen the texture.
-
Avoid soaking too much to prevent drywall damage.
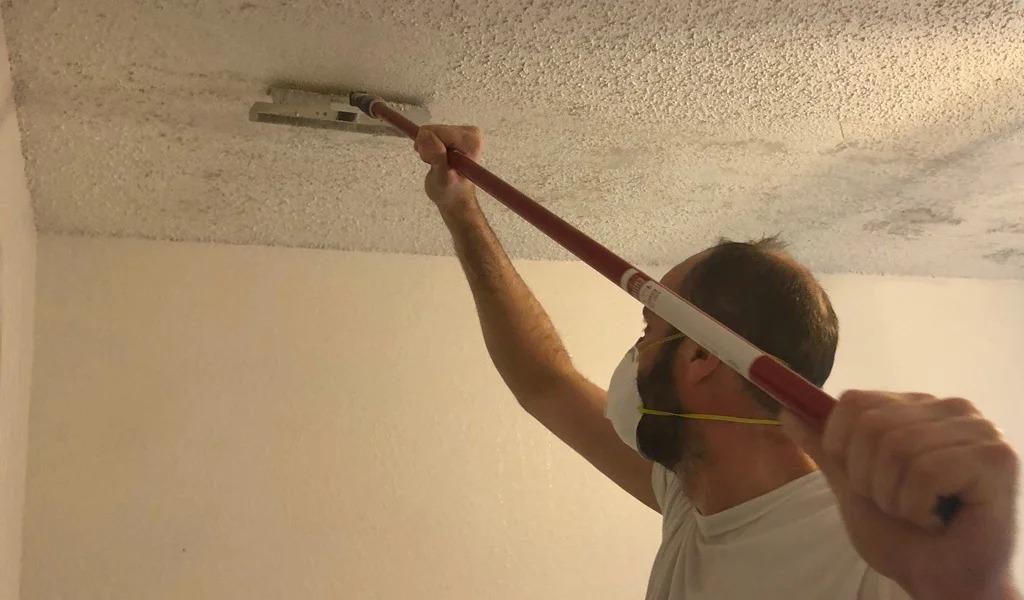
3. Scrape the Texture
-
Use a wide drywall scraper to gently remove the popcorn coating.
-
Work in small sections and take your time to avoid gouging the surface.
-
Collect the debris in a drop cloth for easy cleanup.
4. Smooth and Sand
-
Once the texture is gone, sand the ceiling lightly with fine-grit sandpaper.
-
Check for imperfections and apply a thin layer of joint compound where needed.
-
Sand again after the compound dries for a smooth finish.
5. Prime and Paint
-
Apply a quality primer to seal the surface.
-
Finish with a fresh coat of ceiling paint for a clean, updated look.
DIY vs. Professional Popcorn Ceiling Removal
While it’s possible to remove popcorn texture yourself, it’s not always the best option. Consider the pros and cons of each:
| DIY Removal | Professional Removal |
|---|---|
| Cost-effective if asbestos-free | Higher cost but includes safety and expertise |
| Physically demanding and messy | Proper equipment and containment used |
| Requires prep and cleanup | Faster and cleaner results |
If your ceiling is large or has potential asbestos, hiring a professional popcorn ceiling removal service is the safer and more efficient choice.
Cost of Popcorn Ceiling Removal
The cost depends on several factors such as ceiling size, condition, and whether asbestos testing is required. On average:
-
DIY cost: $1–$2 per square foot
-
Professional removal: $2–$6 per square foot
-
Asbestos abatement: $5–$15 per square foot
While the professional route may seem costly, it ensures safety, saves time, and delivers a better finish.
Alternative Options to Popcorn Ceiling Removal
If you want to avoid the mess or cost of full removal, here are some modern alternatives:
-
Drywall Overlay: Install new drywall directly over the old ceiling for a fresh surface.
-
Plank or Beadboard Panels: Adds charm and a decorative touch.
-
Textured Skim Coat: Smooths the surface without full removal.
These methods can give your ceiling a modern look without the hassle of scraping.
Tips for a Smooth Popcorn Ceiling Removal Project
-
Always wear protective gear, including goggles and a dust mask.
-
Work in sections to maintain control and minimize mess.
-
Keep the area well-ventilated during and after removal.
-
Allow the ceiling to dry completely before painting.
-
Hire professionals if you’re unsure about safety or technique.
Final Thoughts
Popcorn ceiling removal is one of the best ways to update your home’s look, improve air quality, and increase property value. Whether you decide to do it yourself or hire a professional, taking proper precautions will ensure a smooth and safe process.
With the right approach and safety measures, your ceiling can go from dated and dull to modern and beautiful in just a few days.